Sunday 26 February 2012

Shrimp and Feta Pasta - another 1/2 hour wonder

It has been a busy day.  I am getting ready to start my first full time job in 21 years and I lead a craft this morning with Naomi's Hebrew School class.
Andrew is going to cook dinners.  We made up a menu for the week and I went to the grocery to make sure he had everything he needs.
I will to prep in the morning as although we have lived in our house for 18 years and most of the time everything has been kept in the same place, Andrew has trouble finding anything that is not in the front of the cupboard or fridge.  If it is not in his sight line he cannot find it.
He is going to be cooking from my blog.  I will let you know how he does.
The big bag of cooked shrimp were on sale at Costco this week.  Having cooked shrimp on hand means I have quick meals.  Just put them in a bowl of cold water and they are defrosted in about 5 minutes.  Lauren makes herself a salad with shrimp when she comes home from work at 9:30 and I haven't made something she liked.  We also use them for pasta dishes.  As long as you just put them in the sauce long enough to heat them through (no longer) cooked shrimp work great.
Tonight I made one of my favorite pastas.   I got home at 5:30, unpacked the groceries and put them away, made dinner, emptied the dishwasher and we ate at 5:55.

Shrimp and Feta Pasta


Ingredients
500 grams Spaghettini (I use whole wheat)
3 tablespoons olive oil
5 cloves garlic, minced
1 teaspoon dried or 1 tablespoon fresh chopped oregano
1 teaspoon dried or 1 tablespoon fresh chopped basil
1 14 oz can Fire Roasted Tomatoes or two tomatoes chopped
1/2 cup chicken stock
6 oz chopped Feta cheese
1 pound large cooked shrimp (I like to remove the tails)
1/2 cup Italian parsley, chopped

Directions
Prepare Spaghettini according to package directions.  Meanwhile
Heat a large skillet.  Add olive oil, then garlic and if using dried spices, add oregano and basil
Heat for one minute.  Add tomatoes and chicken stock.  Heat to boiling.  Add feta cheese and stir.  When the pasta is cooked add the shrimp, fresh herbs if using and parsley.  Heat through and serve over pasta.


Saturday 25 February 2012

Blondies - ready in 45 minutes

I got this recipe more than 20 years ago from one of those cookbooks that feature specific brands.
They did not have Skor Toffee Chips in those days.  I had to go to the US and by Heath Chips.  I used to stock up when I went and nobody could make Blondies but me.
Now Chipits makes Skor Toffee Chips and you can buy them anywhere.
The recipe uses  melted butter (I do it in the microwave) so it mixes up very easily.  It only bakes for 1/2 hour.
If you haven't tried these you have to make them.  You will be a big hit where ever you take them.


Blondies


Ingredients
½ cup brown sugar
½ cup white sugar
2 eggs
1/3 cup melted butter
1 tsp vanilla
Right out of the oven
1 1/3 cups flour
½ tsp baking powder
¼ tsp salt
1 package Skor Toffee Bits divided

Instructions
Preheat oven to 350
Grease (spray with Pam) 9-inch square pan
Mix sugars, eggs, melted butter and vanilla,
Add dry ingredients just until blended. Fold in 2/3 cup of Skor Toffee Bits
Toffee bits added on top
Bake 30 minutes
Remove from oven and immediately sprinkle remaining Skor Toffee Bits evenly over top
Cool completely before cutting into squares.


Friday 24 February 2012

Not cooking today

To all my loyal followers and to those who are reading my blog for the first time.
I am not cooking today.  I have been out of work since October.  This blog has been my lifeline to keeping busy and feeling like I am accomplishing something while not working.  Thank you all for your support by logging in.
Today I was hired for a full time job and I start on Monday.  Wow.  It will be the first time that I have worked full time out of the house since I have been married.
My life is about to change drastically and I know it will be a change for the good.
I am still planning to "feed my family well".  I will still be making dinners and baking for my family.
I will also be relying on my stocked freezer more often so I won't be cooking every night.  My husband is not working at this time and he is going to help prepare dinner.  I will leave him the materials and the recipes and we will see what happens!!
I won't be posting my blog as often but I will continue to post.  I am sure when I have gotten used to the pace of my new life I will be able post more often.  
Please bear with me as I adjust.
I will be cooking and baking tomorrow and Sunday so keep logging in.
Tonight we are going out to dinner to celebrate.

Thursday 23 February 2012

Grillades and Grits - Andrew's favorite

This recipe is mostly from the Best of New Orleans Cookbook.  Grillades and Grits are Andrew's favorite.  I haven't made them in a long time because they take a lot of time to make and the girls won't eat them.
We went to New Orleans about a year and a half ago in August.   After that experience I have a whole new scale for heat.  Every time you walked out a door it was like walking into an oven.  Oddly all of the interior spaces were air conditioned to a frigid temperature.  Outside it was intensely hot and humid.  The rain offered no relief, it just got hotter and more humid after.  It was as hot at night as it was during the day.
I hate the heat but I would go again in a heartbeat.
New Orleans has a spirit like no other.  It is exactly how it is shown in movies and on TV.  People are walking around on the streets drinks in hand having fun, every club has amazing music and the food is unbelievable.  If I hadn't sweated so much I would have gained more than the four pounds I did manage to gain in four days!!
I loved the quirky, fun atmosphere and the food...
This recipe states that Grillades and Grits are a breakfast item in New Orleans.  Considering most people's heads after a morning of partying I can see it.  In my Oakville world I can't.
We are eating them for dinner.
The Grillades are rich and spicy.  The grits are creamy and a wonderful sponge to absorb the delicious sauce.
Once again I made enough to freeze two meals for us later, once again Andrew ate two portions.  I will freeze the leftover portion for Andrew to eat when I am out for dinner.


Grillades and Grits

Grllades
Ingredients
11/2 pounds eye of the round
1 teaspoon black pepper
3/4 teaspoon salt
3 tablespoons olive oil
2 tablespoons flour
1 large or 2 small onions diced
1 large pepper (any colour) chopped
2 stalks celery, chopped
2 cloves garlic, minced

1 tablespoon Marsha's spice mix (see Feb 27 posting)
1/2 teaspoon red pepper flakes (if you like it spicy)
1/2 teaspoon thyme
2 bay leaves

2 cups beef stock
1 16 oz can diced tomatoes
1 teaspoon red wine vinegar

Instructions

Cut meat into thin slices.  Pound each piece of meat meat between 2 pieces of waxed paper until they have doubled their original size.  Salt and pepper both sides
Heat a large covered skillet, add oil and meat in a single layer, cook until brown (done in batches)
Remove meat and add flour.  Stir flour in oil and drippings for 3 - 4 minutes until flour is browned.
Add onion, peppers, celery and stir until softened (about 3 minutes).  Add garlic and spices and continue stirring for 1 minutes.  Add beef stock and tomatoes cover and simmer for 1 1/2 - 2 hours.  Remove the lid for the last 1/2 hour to thicken the sauce.


Baked Grits
Ingredients
6 cups water
2 teaspoons salt
1 1/2 cups Hominy Grits (available at the Bulk Barn)
1/2 teaspoon black pepper
1/2 cup milk
1 egg
3 tablespoons butter
1/ cup milk

Instructions
Preheat oven to 350
In a large pot bring 6 cups of water to a boil.  Add salt and pepper
Add hominy grits in a steady stream while stirring.  Continue stirring for 7 minutes until the mixture is thick and creamy.
Add butter and mix.
Mix milk and egg in a measuring cup.  Add a couple of tablespoons of the grits to the milk and egg and stir to temper then add the mixture back into the pot and stir.
Spray a 9 inch baking dish with Pam and pour grits into the baking dish.
Bake for 30 - 40 minutes until the top is pale golden brown.


Wednesday 22 February 2012

Grilled Marinated Pork Tenderloin Grilled Asparagus

For my kosher readers please forgive me you can substitute chicken breast or thighs
It is a beautiful day which makes me want to start the barbecue.
I have two pork tenderloins marinating in the fridge.  I like to leave them at least 24 hours and up to 4 days.
Tenderloin is a very lean cut and as in it's name, tender.  It is not the most flavourful meat so I like to marinate it well.
I'm using an Asian marinade and I am making two.  One will be for dinner tonight, one will be used later for one of my favorites Shanghi Noodles.
I'm making the meat with Peanut Udon Noodles which are on my February 7th posting.
My something green will be grilled asparagus - recipe below.  Grilling asparagus take them to a whole new level.

Tip of the Day
  • A porcelain Grill Topper is a must have for grilling.  I use it when grilling asparagus, mushrooms, fish, shrimp scallops and anything else that is small or delicate.  The smaller holes keep food from falling into the grill.
  • Trichinosis is really not an issue in Canada.  I wouldn't suggest eating pork rare but you don't have to cook the life out of it.  Slightly pink will not hurt you.

Marinated Pork Tenderloin 

Ingredients
2 pork tenderloins
4 cloves garlic minced
1 tablespoon Mirin (Chinese cooking wine)
1/4 cup Soy Sauce
1/4 cup Rice Wine Vinegar

Instructions
Put ingredients in zip lock bag, add meat and mix meat around in marinade.  Refrigerate for at least 24 hours.
Heat grill to 400, place meat on grill, reduce heat to 350.  Turn after 10 minutes.  Cook until the pork feels firm 20 - 30 minutes depending on the size of the meat and your barbecue.
Cover with foil and let meat rest for 10 - 15 minutes before slicing

Grilled Asparagus


Ingredients
1 bunch thin asparagus
1 tablespoon olive oil
1 teaspoon Kosher salt

Instructions
While your meat is resting keep the grill on.  Put a "grill topper" (preferably porcelain) on the grill and to heat.
Wash the asparagus.  Remove the "woody" bottoms which will snap off when you hold the woody end hold the the stalk just above the woody end.
Put the asparagus in a plastic bag, add oil and salt and shake to cover.
Place the asparagus on the grill and close.  Check after 3 minutes and move the spears around.  It will be done when it is very lightly charred about 5 minutes.


Tuesday 21 February 2012

My Favorite - Stuffed Peppers

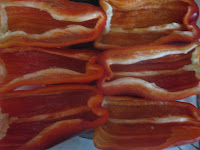
Since I was little I have loved stuffed peppers.  Vegetable, meat and starch all in one.   Peppers are on sale this week.   Andrew does not like green peppers so I am going to stuff red peppers instead.  The peppers that are the best price are red field peppers, so that is what I am stuffing.   I have made these with ground turkey or chicken and brown rice (when I am on a health kick).  Today I am going to use ground beef and white rice.
You can make these ahead of time and leave them in the fridge ready to bake when needed.
I always make double and freeze half for another meal.  As with anything made with tomato sauce they are even better reheated.

Today's Tip
  • When cooking onions it is not a problem if they brown a little.
  • When cooking garlic you have to be careful not to let it brown as it makes the garlic bitter
  • Add your garlic when your vegetables are cooked just before adding the wet ingredients and heat it just until it is fragrant before adding the next ingredients
  • Add spices with the garlic - heat your spices before adding your wet ingredients to bring out their full flavour
Stuffed Peppers
Ingredients
Sauce
1 tablespoon olive oil
1 onion chopped
4 cloves garlic minced
1 tablespoon basil
½ teaspoon red pepper flakes (optional)
1 - 24 oz can diced tomatoes

Peppers
1 cup rice cooked with 2 cups water.
4 bell peppers any colour or 3 very large peppers (like the ones I have made today)
1 pound lean ground beef
1 cup shredded mozzarella (optional)
½ cup grated Parmesan (optional)
½ cup chopped Italian parsley
½ teaspoon salt


Instructions
Put rice on to cook
Heat a medium sauce pan on medium heat and add oil.  Add onions and cook until softened (about 5 minutes).  Add garlic and basil and red pepper flakes (if using) and heat through.  Add tomatoes and bring to a boil.  Reduce heat to low and simmer while you are preparing the peppers.
Preheat oven to 350
Cut peppers in half and remove seeds and ribs.
Arrange peppers in a 9 X 12 baking dish (or what ever dish fits the peppers - divide in two dishes if necessary)
In a medium bowl mix beef, rice, cheeses (if using) parsley and salt (the best way to do this is with your hands).
Stuff the meat mixture into the peppers. 
Pour sauce over stuffed peppers, Cover baking dish with foil and bake for 45 minutes.  Remove foil and baste peppers with sauce.  Continue baking for 15 minutes. 


Monday 20 February 2012

Quick Fiesta Soup - ready in less than 1/2 hour

We are having fish burritos tonight (see my blog Fish and Shrimp Burritos - January 12)
I always make soup with the burritos as once you make up your burrito it has to be grilled.  We eat the soup while our burritos are grilling.  
With a few ingredients you should have in your pantry and freezer you can make this soup in less than 1/2 hour - start to finish.

Tip of the day:
Add shredded cooked chicken and or a can of kidney beans or black beans to this soup and to make it a meal.  Serve with Quesadillas - which can be as simple as cheese melted between two tortillas for a very quick dinner.

Quick Fiesta Soup

Ingredients
1 tablespoon olive oil
1 onion chopped
2 cloves garlic, minced
1 tablespoon cumin
1 can crushed or diced tomatoes
red pepper flakes to taste (I use 1 tsp.)
1 cup salsa
6 cups chicken stock
1 500 gram package frozen vegetables - your choice
1/2 cup frozen corn (if not already in the vegetables you chose)
1.2 cup raw rice
1/2 cup chopped cilantro

Instructions
In a large pot heated on high, add olive oil and onions.  Reduce heat to medium and cook onions until translucent (about 5 minutes),  Add garlic and cumin and red pepper flakes and stir to heat.  Add tomatoes, salsa and chicken stock.  Bring to a boil, add frozen vegetables and rice.  Serve in 20 minutes when rice is soft.  Add chopped cilantro just before serving.  Garnish with crushed tortilla chips and cheese


Sunday 19 February 2012

Turkey Burgers with Blue Cheese (or without)

Beef burgers can be made with just beef but burgers made from ground turkey require breadcrumbs and egg to bind them and make them moist.    I like to put in fresh parsley, they look better and it gives a freshness to the burger.  In the summer I put in a variety of herbs from my garden, oregano, basil and/or thyme.  Parsley alone does the trick when I don't have the option to go out and pick a couple of tablespoons of fresh herbs.
You either like blue cheese or you don't.  Adding a little to the burger gives a lot of flavour.  My girls don't like it but Andrew and I do.  Naomi likes hers plain, Lauren will get a slice of Provolone on top.
Mushrooms and bacon (turkey bacon) go well with blue cheese and plain burgers.  I am a condimentaholic, I like everything (except onions) on my burger.  The rest of my family have their various preference of combinations.  We enjoy meals that you can customize to your particular tastes.
I am making sweet potato and regular potato wedges in the oven  (see Jan 19 blog - Breaded Baked Chicken with Roasted Potato Wedges, Roasted Sweet Potato Wedges, Roasted Fennel and Broccoli. ) and a plate of fresh vegetables to accompany the burgers.
I have been using the " multigrain thin" buns for burgers.  I like them because they are healthier and also because your burger is not overwhelmed by bread.

Tip of the day:
  • When you make burgers of any kind form the patties and allow them to chill in the fridge for at least two hours.  If you don't have the time put them in the freezer for 1/2 hour.  This will help the burgers hold together when grilled.
  • My Panini Grill makes the best turkey burgers.  I close the grill and cook the burgers on both sides.  It cooks them quickly and no problem with the burgers falling apart when you turn them.


Turkey Burgers

Ingredients
1 lb ground Turkey (or chicken)
1/3 cup bread crumbs (you can used seasoned bread crumbs if you like)
1 egg
1/2 cup chopped Italian parsley
1 teaspoon salt
Pepper to taste
4 oz crumbled Blue Cheese (optional )
4 oz sliced cooked mushrooms
8 slices cooked crisp bacon (optional)
4 Multigrain "Thin" buns

Directions
covered with wax Paper
In a medium bowl add ground Turkey, breadcrumbs, egg, parsley, salt and pepper.  Mix with your hands to incorporate.  Add crumbled blue cheese if using (I made two before I put the blue cheese in and then made the other two patties after the blue cheese was added).
Cut five sheets of wax paper cover a plate large enough to hold the burger patties.
Dampen your hands and divide the burger mixture into four parts (dampen your hands as needed if the meat is sticking to them).
Cover a plate with wax paper.  Form a patty with one portion, put on the plate and cover with wax paper, stack the next patty on top and cover with wax paper.  Continue with the other two patties.  Refrigerate for at least 2 hours or if you don't have time put them in the freezer for 1/2 hour.
Spray grill with Pam and heat.  When grill is hot place patties on the grill and cover.  Leave for about 10 minutes (the time really depends on your grill).
Serve on buns with bacon and mushrooms.


Saturday 18 February 2012

Lovely Lemon Squares - Lemon Cheesecake on a Shortbread Crust


I was asked to make a lemon dessert for a diabetic.  I found this recipe which was originally made with Splenda.  I made a double recipe and made them in a 9 X 12 pan.  I had extra when I plated it for my client.  The girls loved them (as did my client).   The girls asked me to please make them again. I have adapted the recipe to be made with sugar and adapted the method to make it in the food processor.  The sugar version is a little sweeter but yummy none the less.

When I made them for my client I put a raspberry on top of each square and put each square into a foil cup.  I don't have raspberries today but I have strawberries so I will put 1/2 of a strawberry on each square.


Lovely Lemon Squares
Ingredients
Crust:
1 1/2 cups all-purpose flour
3/4 sugar
2/3 cup butter cut into cubes

Filling:
4 oz (1/2 pkg) cream cheese at room temperature
1/2 cup sour cream
1 1/2 cups sugar
3 large eggs
1/2 cup lemon juice
1 tbsp finely grated lemon zest

Directions

Crust Baked
Crust:
Preheat oven to 350°F.  Line an 8” square pan with parchment and spray with Pam.   In your food processor with metal blade combine flour and sugar.  Add butter chunks and process until mixed (crust will remain crumbly and not come together). Press into prepared pan and bake for 18 minutes. Cool completely before filling.

Filling:
Baked Squares before cutting
Reduce oven temperature to 325°F (160°C).  In food processor with metal blade add cream cheese process to soften, add sour cream, sugar, eggs lemon juice and lemon zest.  Process until smooth and our over cooled crust. Bake for 40 minutes, until filling no longer jiggles when pan is moved. Cool to room temperature.  Cool for at least 4 hours before slicing.

Friday 17 February 2012

Chinese Chicken on the Q with Green Curry Rice


Naomi has been complaining that she does not like the spices on my roast chicken (everyone else does).  I thought I would try something different.  I seasoned the chicken with a mix of Asian ingredients.  As the days are getting longer it is easier to barbecue (I can see what I am cooking).

Roasting a whole chicken on the barbecue is a very easy dinner.  You put it in a parchment lined foil pan, leave it for 1 1/2 hours and done.  You throw the parchment and the foil pan in the garbage - no clean up!

 I love Thai green curry to I thought I put it int the rice.  I am in an adventurous mood today.

Tip of the day
  • My white meat eaters do not like chicken on the bone.  I carve a chicken the same way I carve a turkey. Remove the wings, the legs and then the thighs slice the breast meat off the bone.  
  • To dispose of the pan the chicken was cooked in put it into the fridge to solidify the fat on the parchment.  It is easy to then remove the parchment and put it into your "green bin" for recycling.
  • The foil pan can go into the "blue box" recycling
Chinese Roast Chicken


Instructions
1 3-4 pound "fryer" washed and patted dry.
1/4 cup hoisin sauce
1 clove garlic chopped
1 tablespoon Mirin (rice wine)
1 tablespoon dark soy sauce
1 teaspoon sesame oil (if you like a little heat use hot sesame oil)

Directions
In a small bowl mix hoisin, garlic, mirin, soy sauce and sesame oil.
Place parchment in a foil pan that is large enough to hold your chicken.
Place chicken in pan and rub down with sauce.  Put your hand under the skin on the breast and rub the sauce into the breast meat.
Heat barbecue to 350.  If you have a three burner barbecue turn the center burner off and turn the other two burners to half heat. Place chicken in the center of the barbecue.   If you have a two burner barbecue turn one burner off and turn the other onto medium heat.  Place chicken on the side where the burner has been turned off.
Close the lid and leave for 1 1/2 hours.
Remove chicken from barbecue, tent with foil and let rest for 10 minutes then carve.

Green Curry Rice


Ingredients
1 onion chopped
1 clove garlic chopped
1 tablespoon vegetable oil
1 pepper chopped (any colour)
1 tablespoons Thai Green Curry Paste
1 cup Jasmine Rice
1 1/4 cups  water
1 cup coconut milk
1/2 cup chopped cilantro

Instructions
Heat sauce pan on high.  Add oil and reduce to medium heat.  Add onion and cook about 2 minutes.  Add peppers and garlic.  Cook another two minutes.  Add curry paste and mix into vegetables.  Add rice and mix to blend.  Add water and coconut milk.  Bring to a boil and reduce heat to low.  Cover and let sit for 20 minutes.  Add chopped cilantro and stir just before serving.

Thursday 16 February 2012

Baked Pasta - Il Forno

Il Forno is Italian for "the furnace" and is a term used for baked pastas.  This is one of those throw in what you have types of recipes.
You can put ricotta cheese in for a creamer dish.  I often add mushrooms but I didn't have any today.  I did have spinach so I put that in.
We don't like it very saucy.  If you like a "wetter" dish add more sauce.  You can use canned Spaghetti sauce if  you like instead of crushed tomatoes.
I had time this morning (I had to drive Naomi to school at 7:00) so I made up the recipe, divided it in two - one for the freezer - and left the one for tonight in the fridge to bake for dinner.

Pasta Il Forno


Ingredients
1 lb penne (I used whole wheat)
2 tablespoons olive oil
1 lb Italian sausage -  pork or turkey, hot or mild sliced
1 large or 2 small zucchini quartered and sliced
1 bell pepper - what ever colour you like - chopped into bite size pieces
1 onion diced
3 large cloves garlic minced
2 cups spinach
1 32 oz can crushed tomatoes
3 cups grated mozzarella cheese
1 cup grated Parmesan cheese

Sausage partially cut
Directions
Cook pasta according to directions
Meanwhile heat a large skillet on high add olive oil.  Add sausage and leave for a minute.  Stir sausage until no longer pink.  Add zucchini, pepper and onion.  Reduce heat to medium and cook stirring occasionally until vegetables have softened (about 5 minutes).   Add garlic and spinach.  Stir until spinach has wilted.  Add tomatoes and stir to blend.  Cook until heated through.In either one 9 X 12 or two 9" casserole dishes add cooked drained pasta.  Add sauce and stir.  Add 2 cups of mozzarella and all of the Parmesan cheese and stir.  Cover casserole with foil  and bake for 40 minutes until heated through.  Uncover, sprinkle with remaining cheese and bake for another 5 minutes until cheese is melted.

Sausage, Peppers, Zucchini, Onion
Add Spinach

Spinach wilted and mixed in 


Add tomatoes 
Ready to go into the oven


Cheese added and ready to eat